我需要用 php 来实现这个效果。我知道 PHP 图像过滤器中有 IMG_FILTER_PIXELATE 。但我需要它更光滑和浮雕?就像这张图片:

这种效果会使用户上传的任何图像变得像素化并且图片的边缘变成红色(我知道 IMG_FILTER_EDGEDETECT 但我不知道如何使用它来改变边缘颜色)。
我不知道该怎么做。
由于最后一个答案是理论上的并且似乎还不够,我创建了一个实际示例:
注意:这远非“理想”和完美的像素化效果功能,但它确实可以完成工作。随意根据自己的需要进行编辑。
<?php
/* Function to make pixelated images
* Supported input: .png .jpg .jpeg .gif
*
*
* Created on 24.01.2011 by Henrik Peinar
*/


/*
* image - the location of the image to pixelate
* pixelate_x - the size of "pixelate" effect on X axis (default 10)
* pixelate_y - the size of "pixelate" effect on Y axis (default 10)
* output - the name of the output file (extension will be added)
*/
function pixelate($image, $output, $pixelate_x = 20, $pixelate_y = 20)
{
    // check if the input file exists
    if(!file_exists($image))
        echo 'File "'. $image .'" not found';

    // get the input file extension and create a GD resource from it
    $ext = pathinfo($image, PATHINFO_EXTENSION);
    if($ext == "jpg" || $ext == "jpeg")
        $img = imagecreatefromjpeg($image);
    elseif($ext == "png")
        $img = imagecreatefrompng($image);
    elseif($ext == "gif")
        $img = imagecreatefromgif($image);
    else
        echo 'Unsupported file extension';

    // now we have the image loaded up and ready for the effect to be applied
    // get the image size
    $size = getimagesize($image);
    $height = $size[1];
    $width = $size[0];

    // start from the top-left pixel and keep looping until we have the desired effect
    for($y = 0;$y < $height;$y += $pixelate_y+1)
    {

        for($x = 0;$x < $width;$x += $pixelate_x+1)
        {
            // get the color for current pixel
            $rgb = imagecolorsforindex($img, imagecolorat($img, $x, $y));

            // get the closest color from palette
            $color = imagecolorclosest($img, $rgb['red'], $rgb['green'], $rgb['blue']);
            imagefilledrectangle($img, $x, $y, $x+$pixelate_x, $y+$pixelate_y, $color);

        }
    }

    // save the image
    $output_name = $output .'_'. time() .'.jpg';

    imagejpeg($img, $output_name);
    imagedestroy($img);
}


pixelate("test.jpg", "testing");


?>
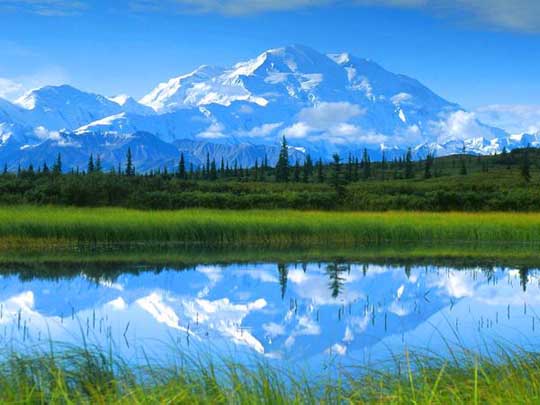
这是在图像上创建像素化效果的示例函数。以下是使用此函数的示例结果:
Original:
Pixelated 5px:
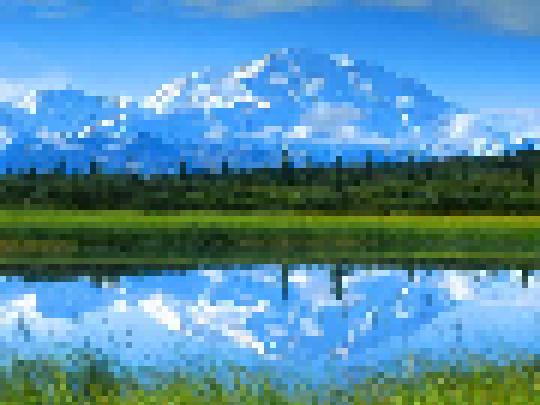
Pixelated 10px:

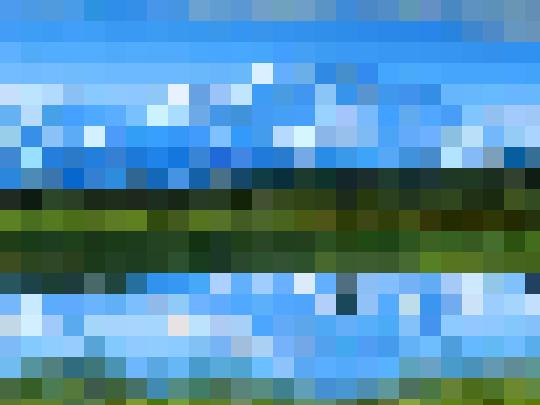
Pixelated 20px:
谢谢您的回答。我使用了您的函数并添加了另一个循环来使用http://www.php.net/manual/en/function.imageline.php中名为 imagelinethick 的函数更改正方形外部像素的颜色。于是变成了:
<?php
$image = imagecreatefromjpeg('Penguins.jpg');
$imagex = imagesx($image);
$imagey = imagesy($image);

$pixelate_y=10;
$pixelate_x=10;
$height=$imagey;
$width=$imagex;
for($y = 0;$y < $height;$y += $pixelate_y+1)
{
    for($x = 0;$x < $width;$x += $pixelate_x+1)
    {
    // get the color for current pixel
    $rgb = imagecolorsforindex($image, imagecolorat($image, $x, $y));

    // get the closest color from palette
    $color = imagecolorclosest($image, $rgb['red'], $rgb['green'], $rgb['blue']);

    imagefilledrectangle($image, $x, $y, $x+$pixelate_x, $y+$pixelate_y, $color);
    }
}


for($y = 0;$y < $height;$y += $pixelate_y+1)
{
for($x = 0;$x < $width;$x += $pixelate_x+1)
{
    //make a border line for each square
    $rgb = imagecolorsforindex($image, imagecolorat($image, $x, $y));
    $color = imagecolorclosest($image, 123, 123, 123);
    imagelinethick($image, $x, $y, $x, $y+$pixelate_y, $color, 1);
    imagelinethick($image, $x, $y, $x+$pixelate_x, $y, $color, 2);
}
}

function imagelinethick($image, $x1, $y1, $x2, $y2, $color, $thick = 1)
{
    /* this way it works well only for orthogonal lines
    imagesetthickness($image, $thick);
    return imageline($image, $x1, $y1, $x2, $y2, $color);
    */
    if ($thick == 1) {
        return imageline($image, $x1, $y1, $x2, $y2, $color);
    }
$t = $thick / 2 - 0.5;
if ($x1 == $x2 || $y1 == $y2) {
    return imagefilledrectangle($image, round(min($x1, $x2) - $t), round(min($y1, $y2) - $t), round(max($x1, $x2) + $t), round(max($y1, $y2) + $t), $color);
}
$k = ($y2 - $y1) / ($x2 - $x1); //y = kx + q
$a = $t / sqrt(1 + pow($k, 2));
$points = array(
    round($x1 - (1+$k)*$a), round($y1 + (1-$k)*$a),
    round($x1 - (1-$k)*$a), round($y1 - (1+$k)*$a),
    round($x2 + (1+$k)*$a), round($y2 - (1-$k)*$a),
    round($x2 + (1-$k)*$a), round($y2 + (1+$k)*$a),
);
imagefilledpolygon($image, $points, 4, $color);
return imagepolygon($image, $points, 4, $color);
}

header("Content-Type: image/JPEG");
imageJPEG($image, "", 75);

?>
结果是这样的: http: //www.flickr.com/photos/52700219@N06/6759029339/
但是我认为这仍然需要一些改进才能使其更流畅。
理论上是这样的:
你有一个图像:
RGBRGBRGBRGB
GBRGBRGBRGBR
GBRGBRGBRRGB
BGRGBGRGGRBG
取第一个像素的颜色并为下一个像素的正方形设置相同的颜色(向下和右侧)。然后取第 5 个像素的颜色(因为一开始的 4 个像素已经具有相同的颜色)。如果您完成了第一行,请向下 +3 行并重新开始。
所以你得到:
RRRRGGGBBBB
RRRRGGGBBBB
RRRRGGGBBBB
RRRRGGGBBBB
在 PHP 中,您可以使用以下函数来实现这一点:
http://php.net/manual/en/function.imagecolorat.php选择像素的颜色
http://php.net/manual/en/function。 imagecolorset.php设置像素颜色
http://php.net/manual/en/function.imagesx.php获取图像宽度
http://php.net/manual/en/function.imagesy.php获取图像高度
通过图像的像素使用 for 循环
这是我对这个问题的尝试。
您可以更改像素化块的大小,并且可以应用模糊来柔化高对比度图像的效果。但是,对于具有小像素化块大小的大图像可能会很慢。
脚本将相关像素的颜色存储在一个数组中。然后它对图像进行浮雕,根据需要改变对比度,使用 imagefilter() 函数对图像进行像素化,然后(如果设置了瓷砖增强)再次对其进行浮雕(这会增加最终瓷砖的 3D 效果)。如果需要模糊,脚本将应用高斯模糊。然后,该脚本使用颜色数组绘制填充正方形,以在浮雕瓷砖边框内创建彩色像素化效果。
function pixelatemboss($image,$blockwidth=10,$blur=5,$tileenhance="true",$contrast=0,$negate="true")
{
    if($blockwidth>1)
    {
        imagefilter($image,IMG_FILTER_CONTRAST,$contrast);

        for($x=1;$x<imagesx($image);$x=$x+$blockwidth)
        {
            for($y=1;$y<imagesy($image);$y=$y+$blockwidth)
            {
                $color[$x][$y]=imagecolorat($image,$x,$y);
            }
        }

        imagefilter($image,IMG_FILTER_EMBOSS);
        imagefilter($image,IMG_FILTER_CONTRAST,$contrast);
        imagefilter($image,IMG_FILTER_PIXELATE,$blockwidth,false);
        if($tileenhance=="true")
        {
            imagefilter($image,IMG_FILTER_EMBOSS);
        }
        for($b=0;$b<$blur;$b++)
        {
            imagefilter($image,IMG_FILTER_GAUSSIAN_BLUR);
        }
        for($x=1;$x<imagesx($image);$x=$x+$blockwidth)
        {
            for($y=1;$y<imagesy($image);$y=$y+$blockwidth)
            {
                $rgb=$color[$x][$y];
                $r = ($rgb >> 16) & 0xFF;
                $g = ($rgb >> 8) & 0xFF;
                $b = $rgb & 0xFF;
                $col=imagecolorallocate($image,$r,$g,$b);
                imagefilledrectangle($image,$x,$y,$x+($blockwidth-2),$y+($blockwidth-2),$col);
            }
        }
    }
    return $image;
}
注意 php 5.4 及更高版本您需要使用:
imageJPEG($image, NULL, 75);
您不能再使用双引号指定 NULL(如此示例):
imageJPEG($image, "", 75);